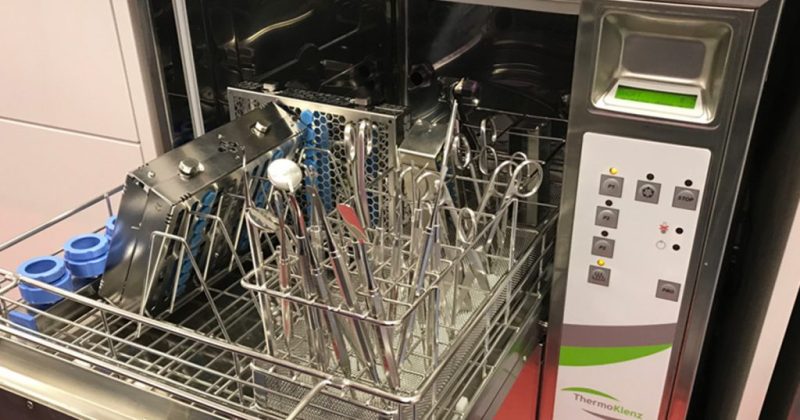
Washer-disinfectors are the preferred method for reprocessing instruments in the dental setting. They offer a repeatable, validated process while significantly reducing the risk of sharps injuries to staff.
How do washer-disinfectors work?
The cleaning process in washer-disinfectors is based on the principle of impingement — the use of high-pressure water jets to physically remove debris. Washer-disinfectors also include a thermal disinfection stage to kill microorganisms effectively.
Washer-disinfectors typically follow a five-step process:
1. Flush Stage
Instruments are rinsed with cold water to remove visible debris before cleaning and disinfection. Cold water helps prevent protein-based substances, such as blood, from fixing to the instrument surfaces.
2. Wash Stage
Any remaining soil and organic matter is removed using warm water and detergent. This combination breaks down contamination, ensuring thorough cleaning.
3. Rinse Stage
Instruments are thoroughly rinsed to remove residual detergents, which could interfere with disinfection or cause chemical corrosion if left on instruments.
4. Thermal Disinfection Stage
Heat is used to destroy microorganisms. To achieve effective disinfection, the washer-disinfector must reach and hold either:
90 °C for 1 minute, or
80 °C for 10 minutes, Depending on the cycle.
5. Drying Stage
Filtered warm air is used to dry instruments, preventing water spotting and microbial growth, and preparing instruments for inspection, packaging, and sterilisation.
Washer-disinfectors and Best Practice
The HTM 01-05 outlines Best Practice and Essential Quality Requirements (EQRs) for instrument decontamination in dental practices. Under Best Practice:
Progress towards achieving best practice should include the following: Install a validated washer-disinfector of adequate capacity to remove the need for manual washing.
HTM01-05
Washer-disinfectors are the preferred method for decontaminating instruments for the following key reasons:
Thermal disinfection is more reliable than chemical cleaning, effective against a broader range of microorganisms, and eliminates concerns about residues or chemical compatibility.
The process is automated, consistent, and verifiable through validation.
They significantly reduce the risk of sharps injuries to staff.
Installing a washer-disinfector may not always be possible due to space, cost, or other constraints. In such cases, it is essential to:
Adhere to the Essential Quality Requirements of HTM 01-05.
Consider developing a medium- or long-term plan to install a washer-disinfector. This demonstrates the practice’s commitment to achieving Best Practice standards.
Key considerations when using washer-disinfectors
To ensure effective and safe operation of washer-disinfectors, practices must:
Train users in the correct operation of the washer-disinfector, including validation, maintenance, troubleshooting, and recordkeeping. Maintain up-to-date training records.
Follow the manufacturer’s instructions for loading, chemical dosing, maintenance schedules, and cycle parameters.
Validate the washer-disinfector as per HTM 01-05 and the manufacturer’s requirements. (See our article on washer-disinfector validation for more details.)
Load instruments correctly:
Do not overload or stack instruments.
Ensure hinges and joints are opened fully.
Instruments requiring irrigation must be properly connected, with any necessary filters in place (e.g., for handpieces, as per manufacturer instructions).
Washer-disinfectors play a vital role in ensuring consistent, safe, and compliant decontamination of dental instruments. While their installation may not always be immediately feasible, understanding their benefits and integrating them into long-term planning is key to aligning with best practice standards.